Smartsheet is a versatile and innovative platform designed to help you manage projects, collaborate seamlessly, display data effectively, and much more! Here are some key Smartsheet features that can enhance the work you do and get you started on your next project management plan!
How to create a simple project management plan:
1. Create a Smartsheet account (anyone can create a free account, but features are limited.)
2. Once you are logged in to your account, click "Create" in the top right corner.
3. Click on 'Grid' to start a template from scratch or click 'Browse Templates' to choose from a variety of templates.
4. Name your sheet and begin modifying it to for your needs.
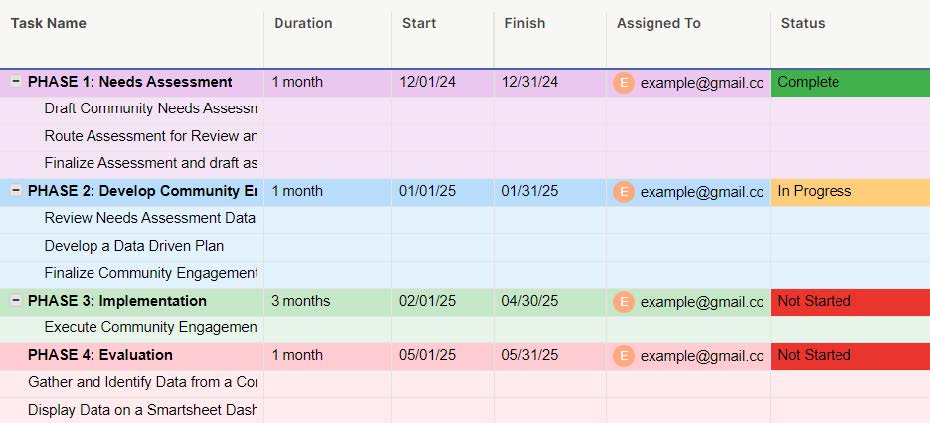
Key Features to modify your project management sheet:
1. Insert, delete, and edit column properties
a. Right Click on a column and choose one of the options in the drop-down menu
b. You can also edit the column type by clicking on “Edit Column Properties…” and selective from the drop-down menu to format the column as a check box, drop-down list, date, contact, etc.
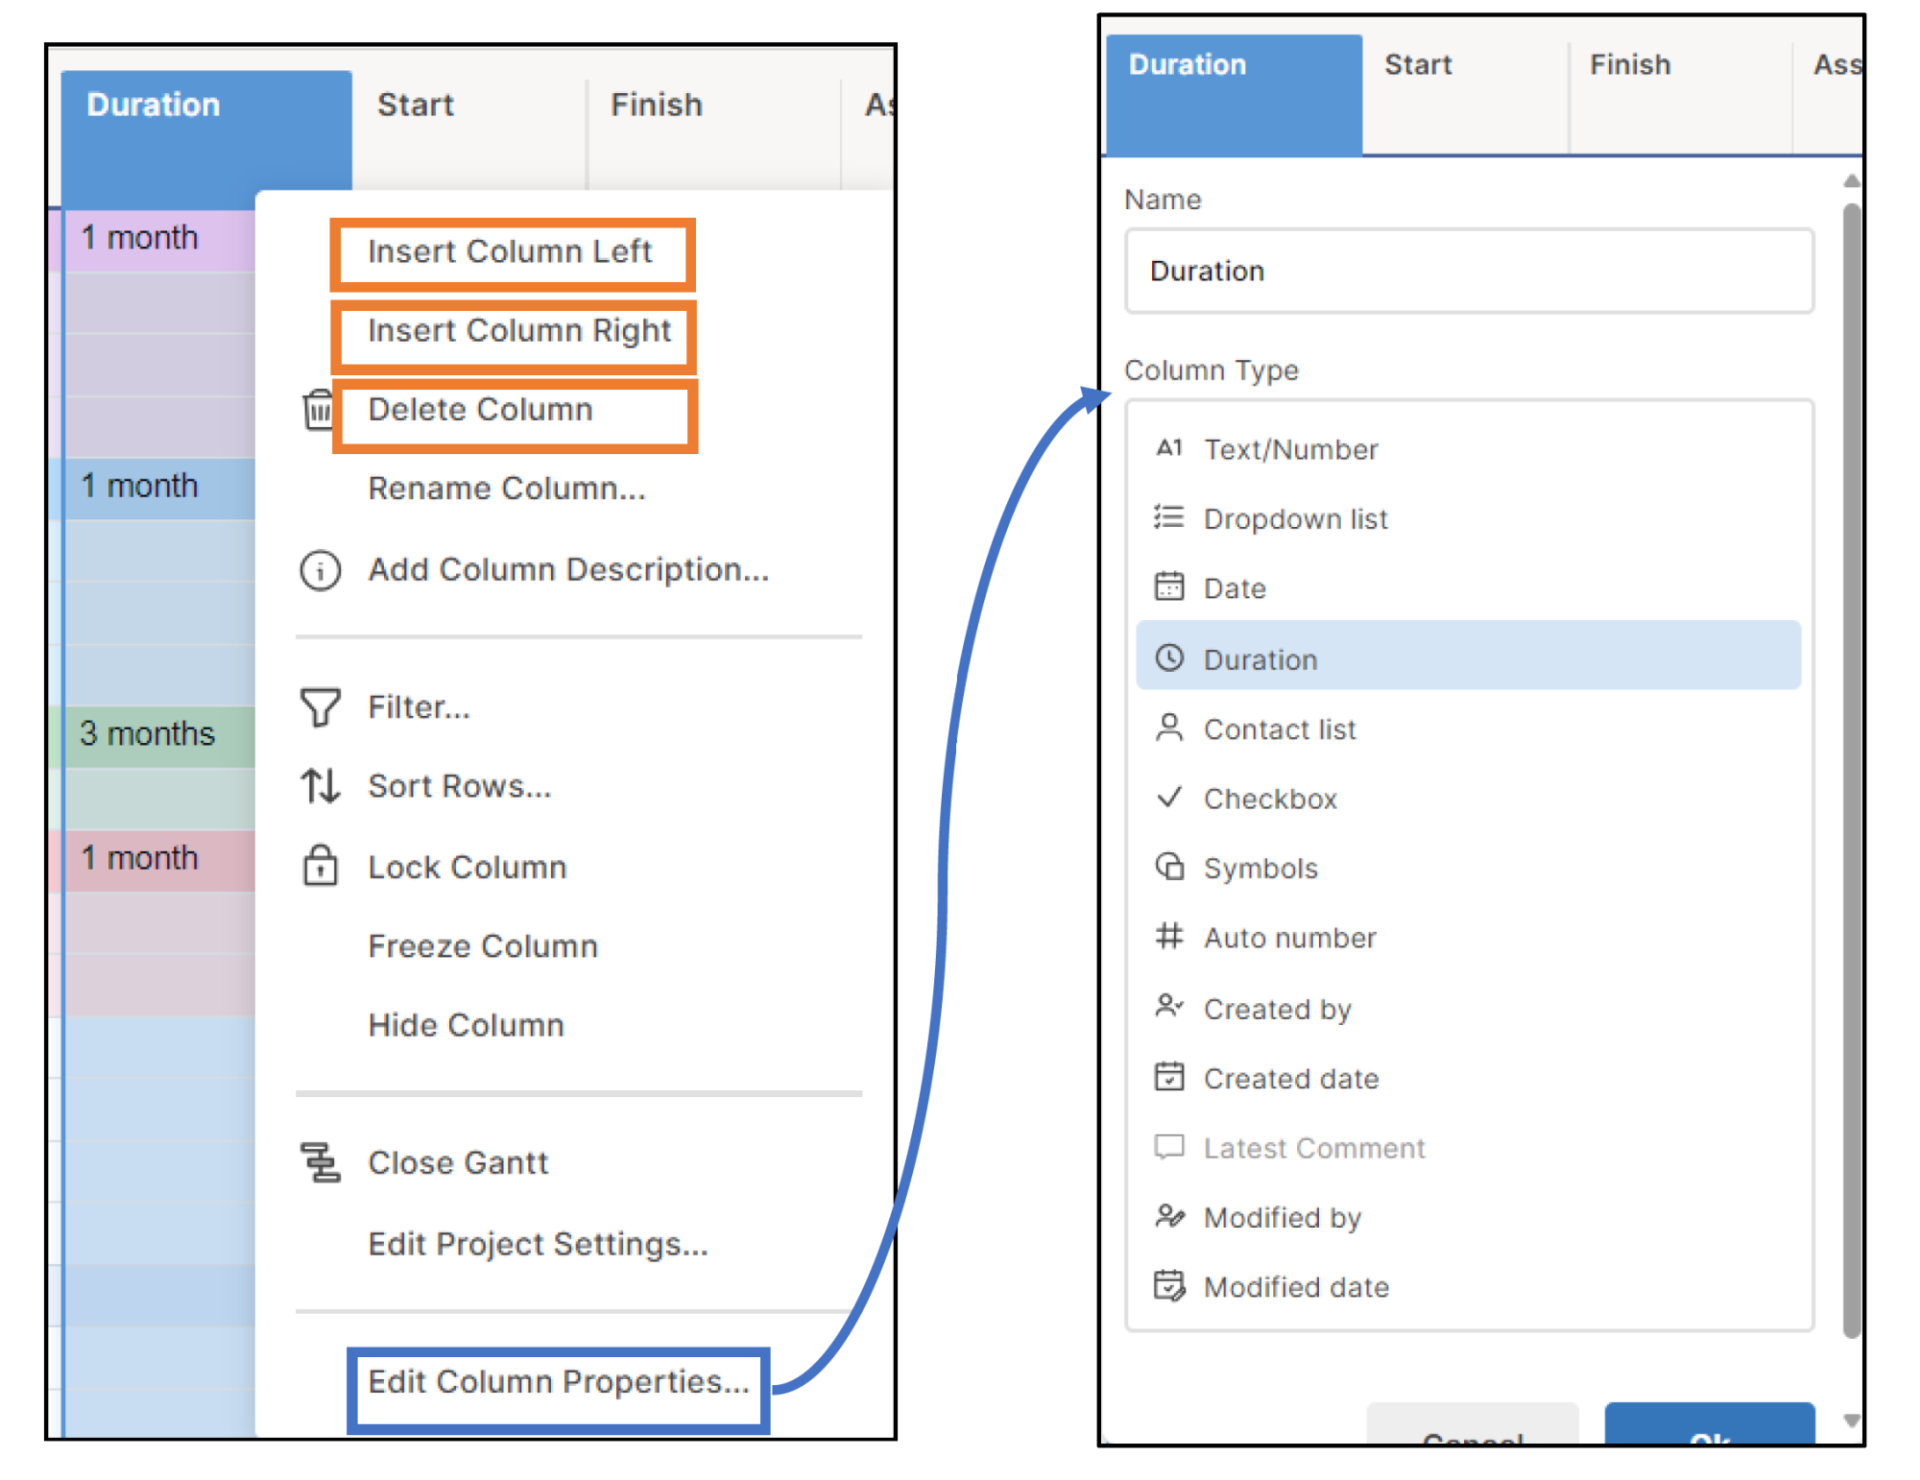
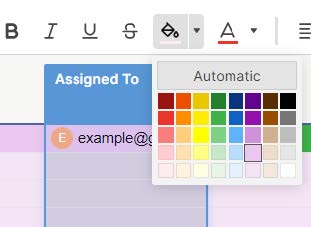
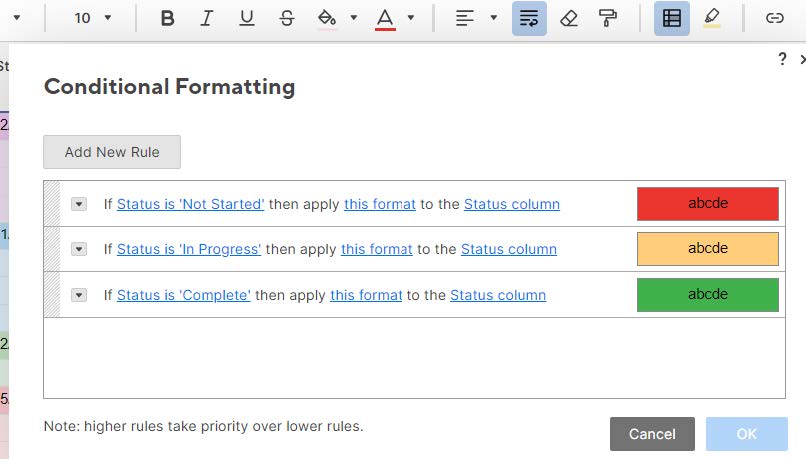
2. Add Color by "fill" or "conditional formatting"
a. You can add color to any cell, row, or column by right clicking the cells that you would like to fill with color and choosing the paint bucket icon in the top toolbar.
b. To add conditional formatting (color changes when certain criteria is met), click on the rectangular icon on the top toolbar, add a new rule, and follow the prompts
*If you hover your mouse over the conditional formatting icon, there is a helpful tutorial
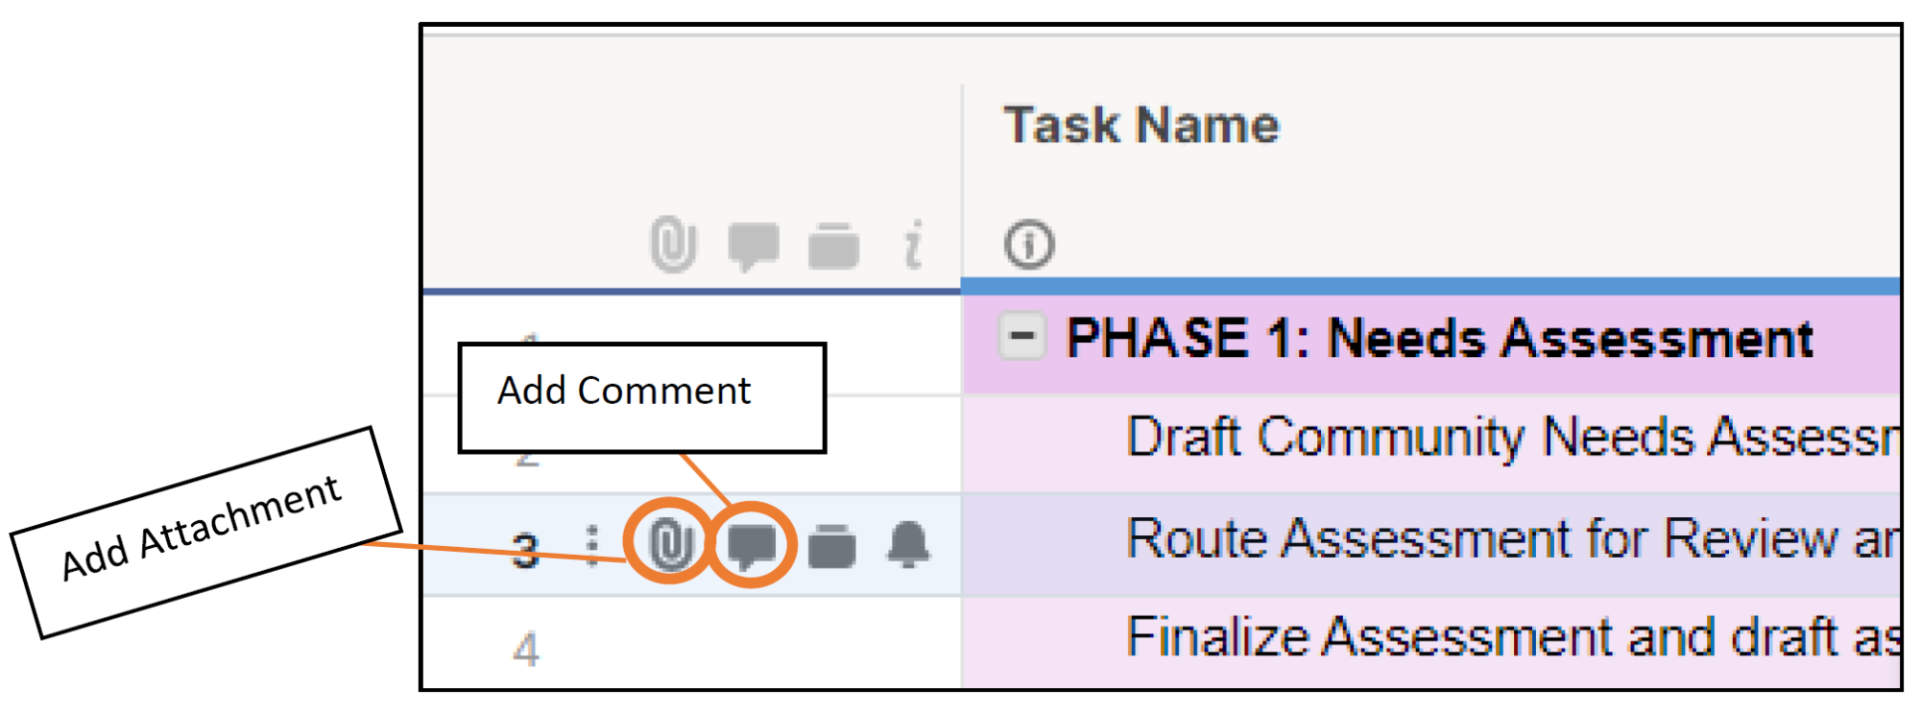
3. Add Notes and Attachments
a. You can add notes and attachments to any row
b. Additionally, you can tag people who have access to the sheet by typing '@' and then their name and they will be notified that they have been tagged in a comment via email
4. Add Automations
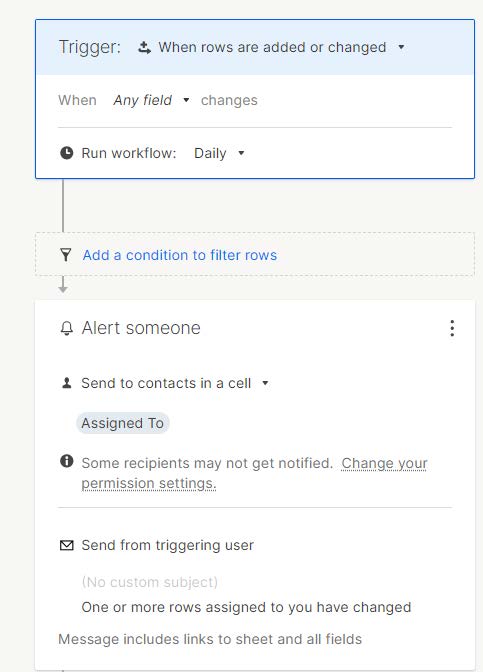
Automation is a tool that can be used to automatically send notifications or move rows when certain criteria are met.
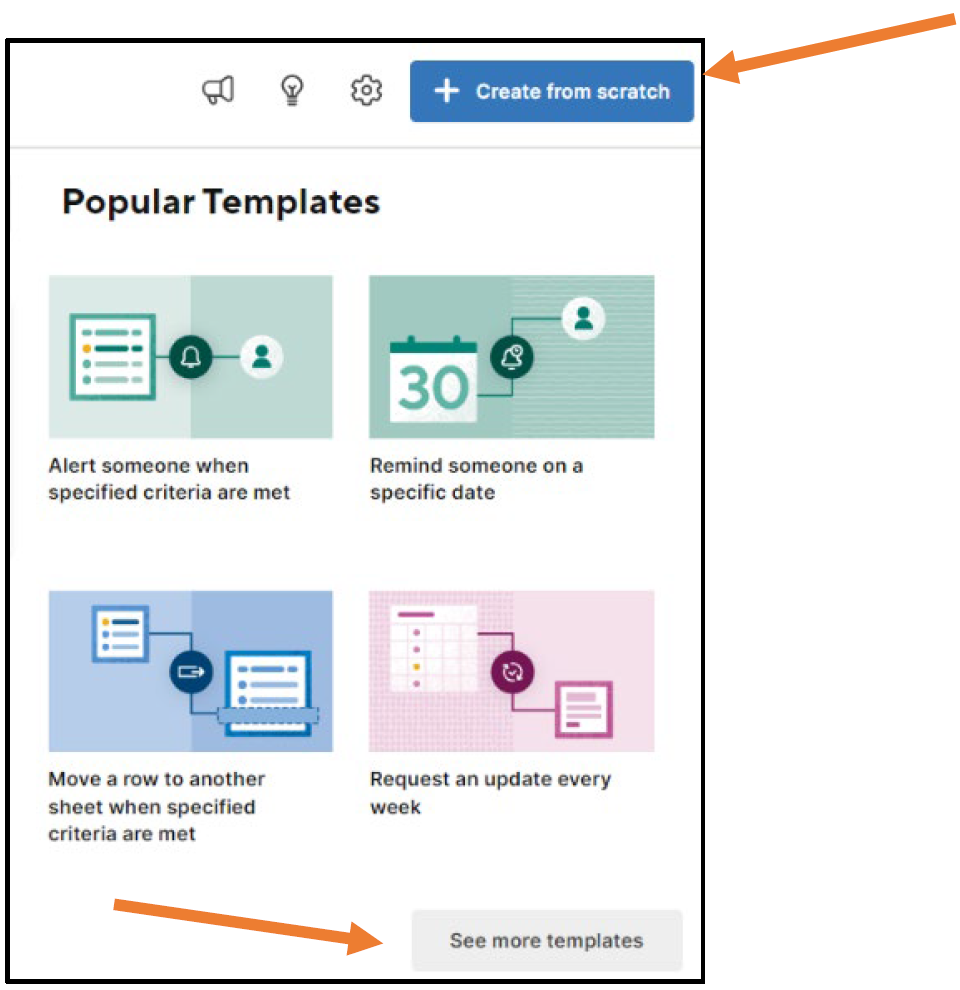
a. Create automations to:
i. Notify people when certain criteria are met
ii. Move rows to other sheets when certain criteria are met
iii. Set reminders
b. To create automations
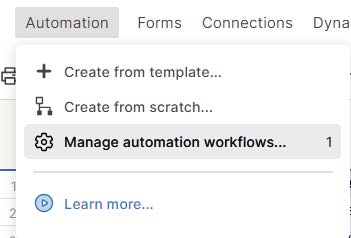
i. Click on 'Automation' in the top left corner
ii. Then click 'Manage Automation Workflows...'
iii. From there, you can create an automation from scratch or use a template
iv. Then follow the prompts
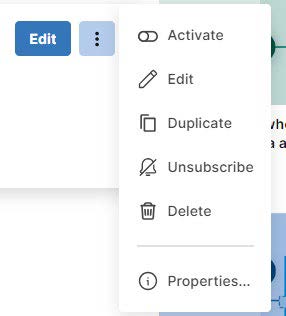
v. Finally, click on the 3 little dots to activate the automation
5. Collaborate with others
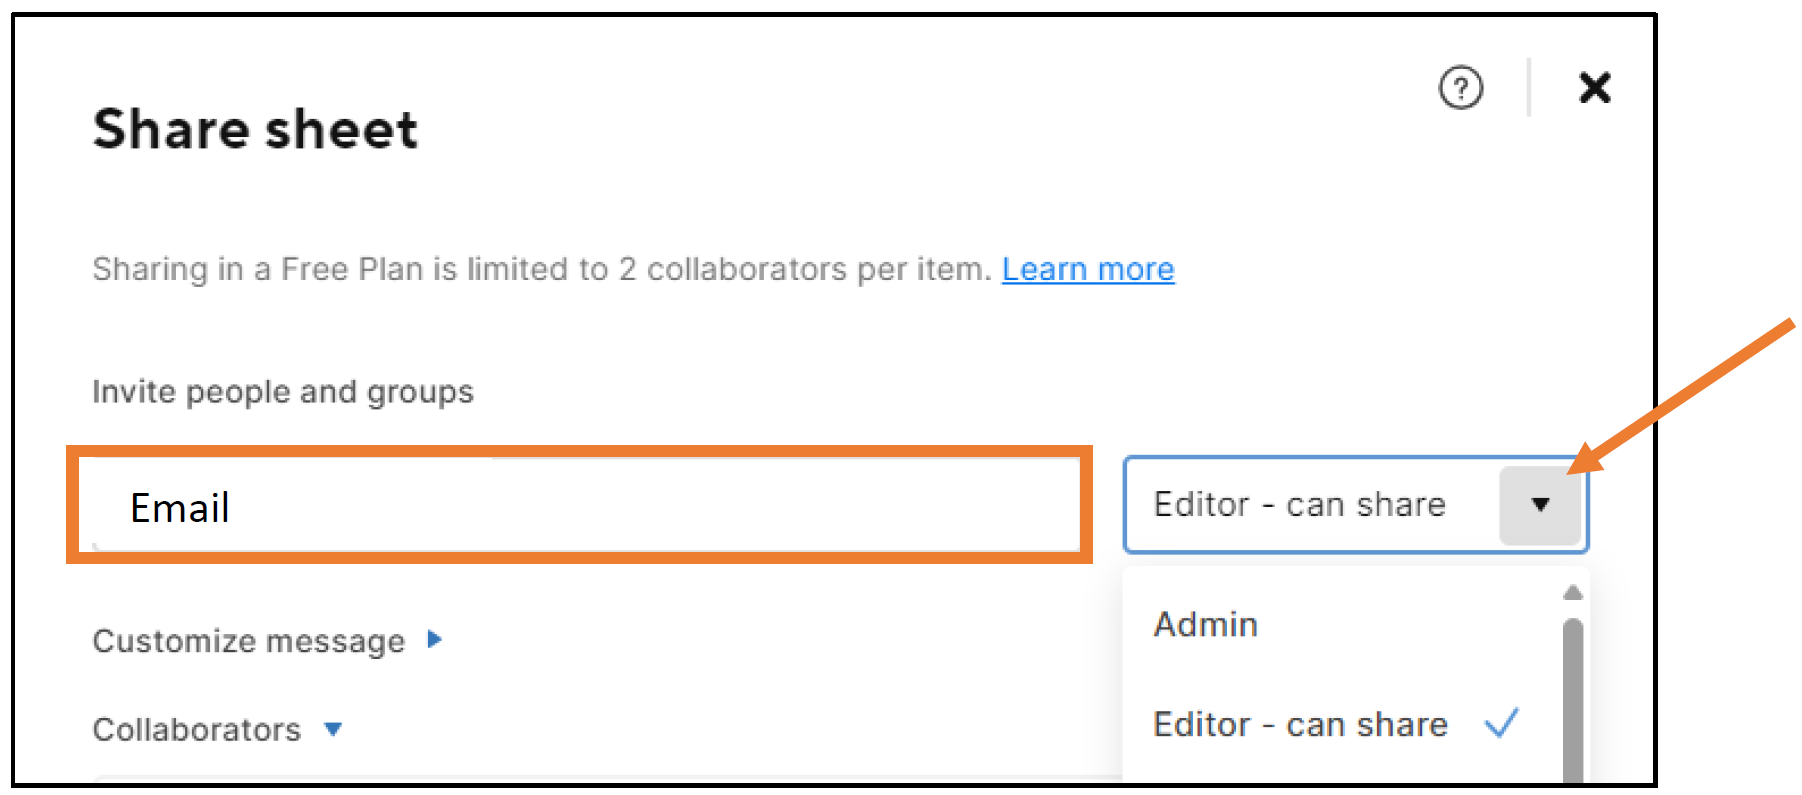
a. To share the sheet or workspace with others, click on the “share” button in the top right corner
b. Then enter the email addresses that you would like to share the sheet/workspace with
c. Choose the level of permissions you would like to share with that person
d. Click the “share” button
Once you have learned some of the basic Smartsheet functions, you are ready to dive into everything else that Smartsheet has to offer! Smartsheet has amazing information and tutorials that will teach you how to use some of the other key features.
• Dashboards
• Reports
• Formulas
• Forms
Help and Learning | Smartsheet Learning Center